How to Test Secured Android Apps on Katalon
This knowledge-based article outlines the steps necessary to test Android mobile apps secured by Appdome using the Katalon cloud testing platform. Follow these instructions to ensure your application functions as expected under secured conditions without triggering unintended security protocols.
Use Appdome’s Build2Test Service (Recommended)
Customers with an Appdome SRM license can benefit from the Build2Test service. This service allows quick and easy testing of Appdome-secured mobile apps using Katalon without the need for different Fusion Sets. With Appdome’s Build2Test service, Appdome’s in-app defense model recognizes the unique signature of these testing services, facilitating seamless testing without security alerts or app shutdowns, even when tools like Magisk or Frida are used.
Detailed Guide to Using Build2Test
For more comprehensive instructions, refer to our guide: How to Use Appdome Mobile App Automation Testing.
Understanding Security Triggers When Testing Android Apps on Katalon
When testing Android apps on Katalon, Appdome protection features may respond because they detect specific conditions when the mobile app is running on the mobile device. With Build2Test, instead of causing interruptions, the app records the event and continues testing.
The following table describes which Appdome protection features may be triggered and the reason why:
| Appdome feature | Reason |
| Block Android Debug Bridge (ADB) | Activated if the app detects ADB commands running on the device. |
| Anti-Tampering | Activated if any unauthorized changes to the app’s code or resources are detected. |
| Detect VPN | Activated if the app detects a VPN connection. |
| Detect Developer Options | Activated if developer options are enabled on the device. |
| Detect App is Debuggable | Activated if the app is set to a debuggable state. |
| Runtime Bundle Validation | Activated if there are discrepancies in the app bundle. |
| Enforce Cipher Suites | Activated if insecure cipher suites are used for network connections. |
| URL Whitelisting | Activated if the app accesses URLs not on the app’s approved whitelist. |
| Block Memory Editing Tools | Activated if memory editing tools attempt to modify the app’s memory during runtime. |
Prerequisites for Testing Secured Android Apps Using Katalon
Ensure you have the following set up before beginning:
- Appdome Account: create a free Appdome account here
- Mobile App (.ipa for iOS, or .apk or .aab for Android)
- Appdome Fused App with Build2Test: Required to initiate testing with Katalon.
- Katalon Account: Neccessary for accessing testing features.
- Physical Device: Required for real (live) app testing on Android.
Setting Up Your Testing Environment in Katalon
Access and Setup for Live App Testing
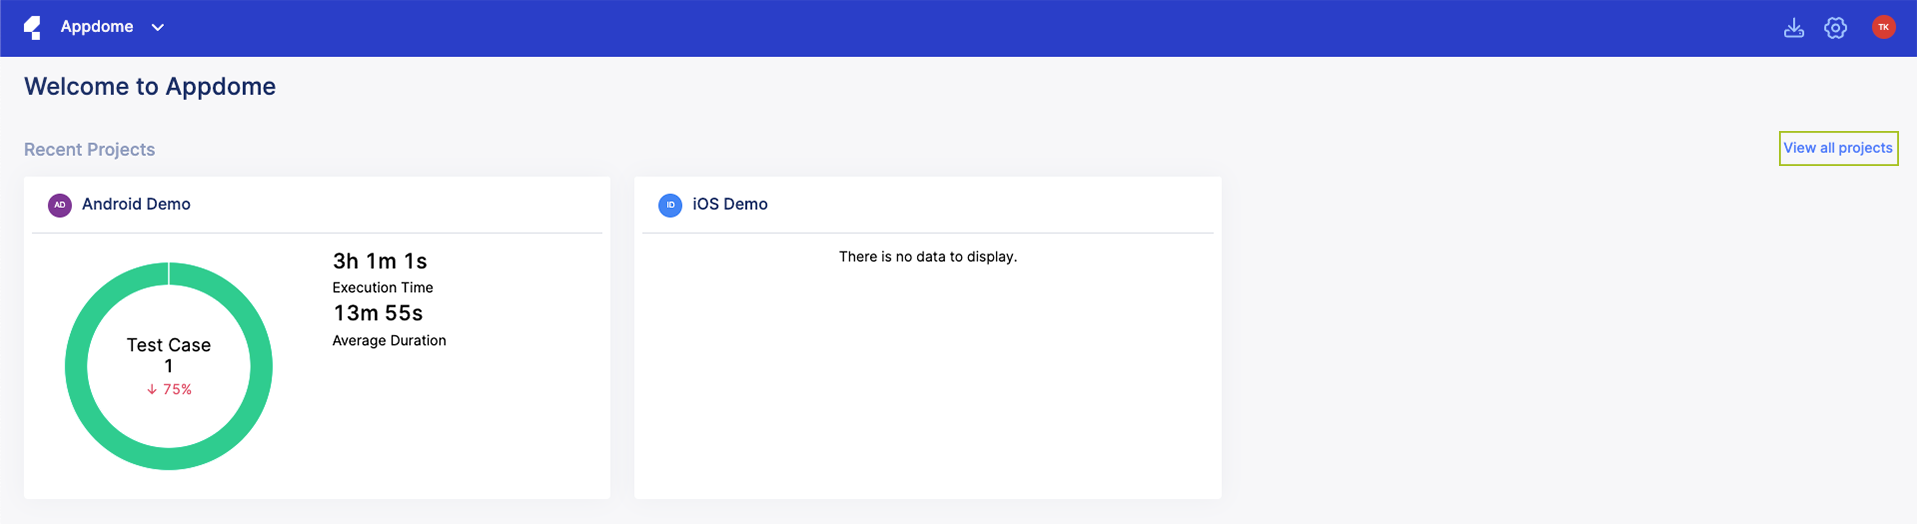
- Sign in to Katalon TestOps.
- Click on the “Open TestOps” button to access the dashboard.
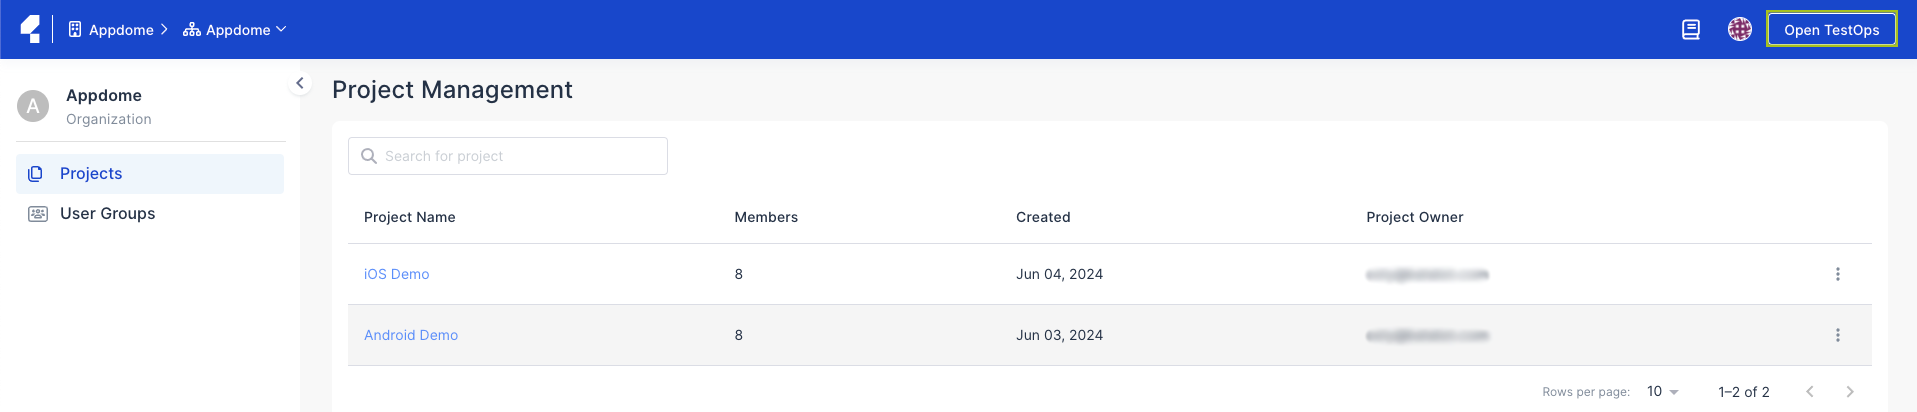
- Click “View all projects” to see a list of your current projects.
Repository and Project Configuration
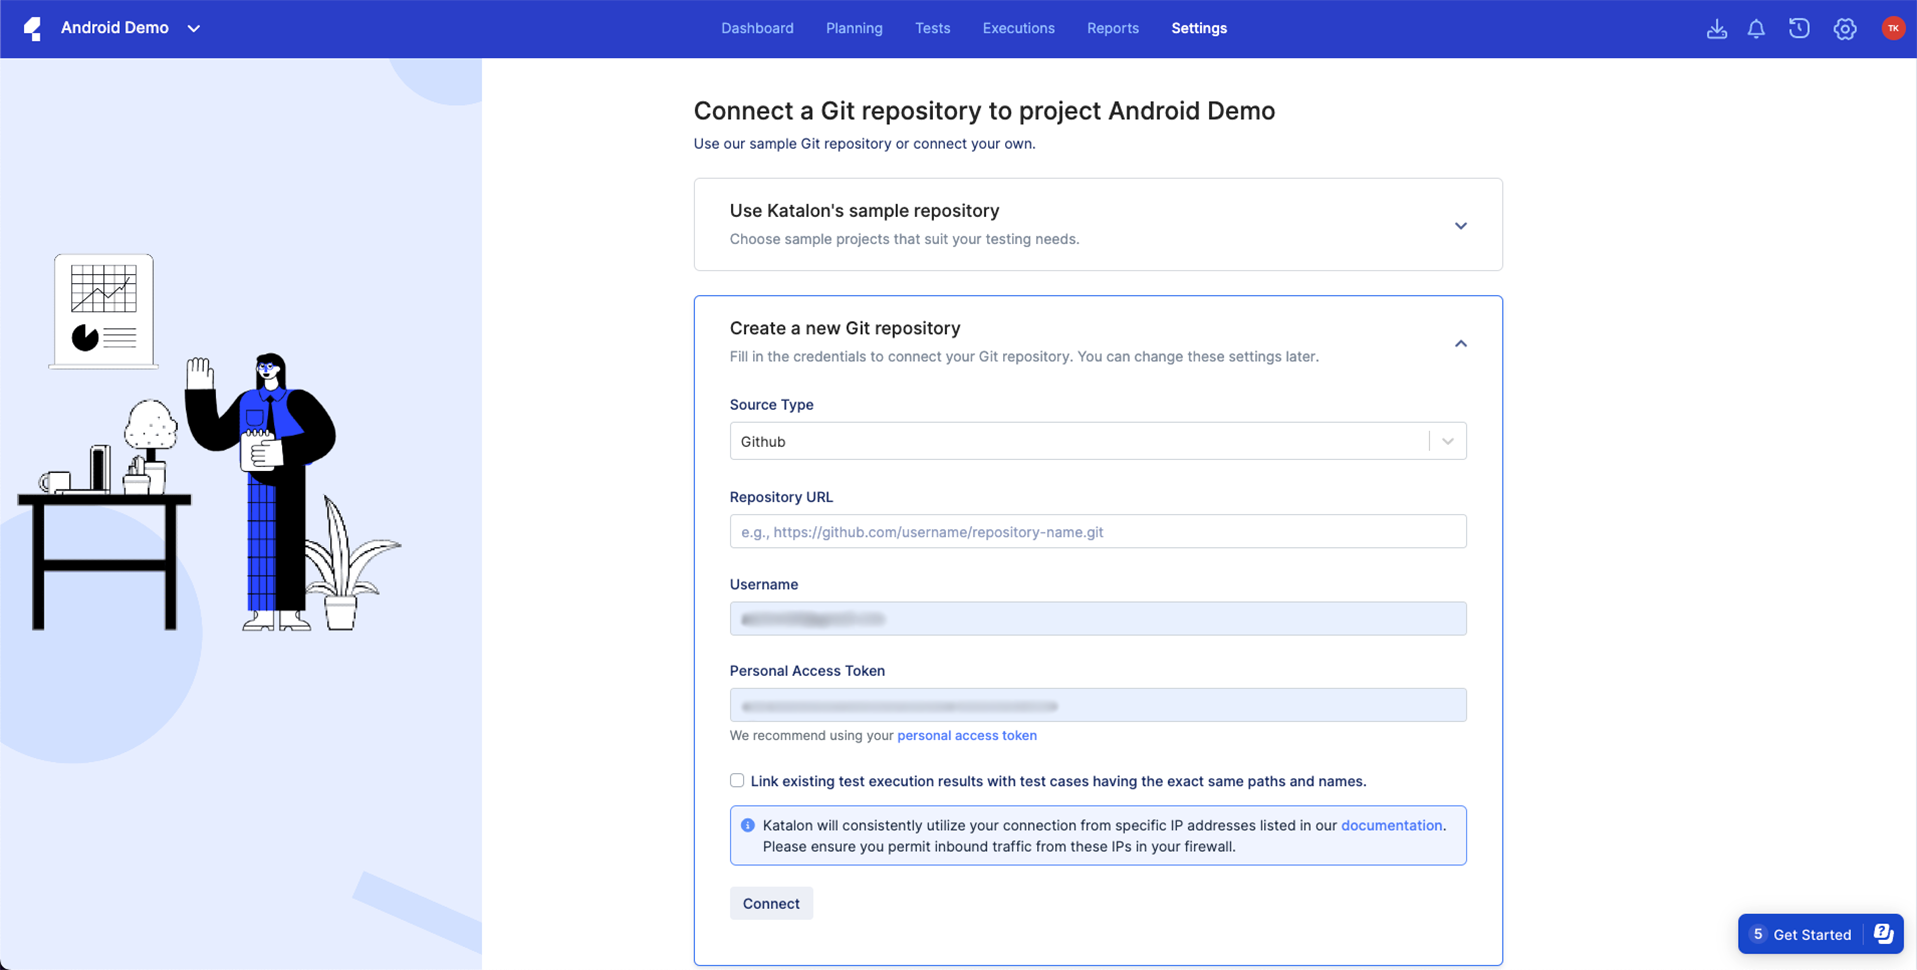
- Navigate to Settings > Script Repository > Connect Git Repository to integrate your Git repository.
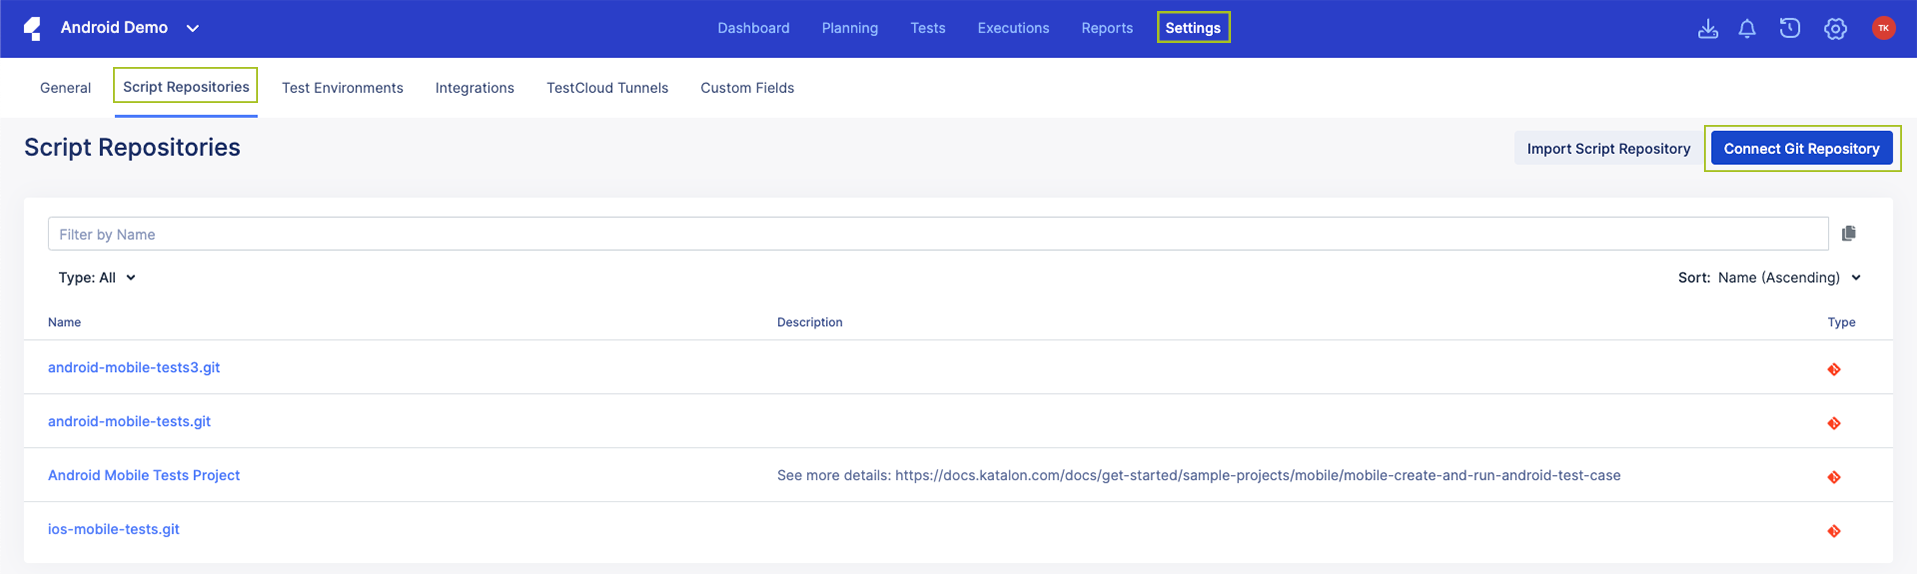
- Create a new Git Repository in your preferred service (e.g., GitHub, GitLab).
- Enter your source type, repository URL, username, and personal access token, then click “Connect”.
- To use your own Git repository with your test cases, create them in Katalon Studio, which you can download here.
- You can use the following demo repository from Katalon as an example: Katalon Studio Samples
Katalon Studio Setup
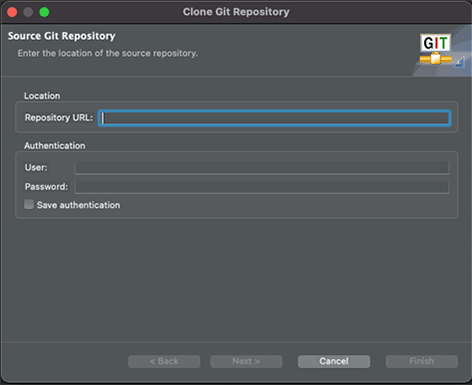
- Open your Katalon Studio application
- Click “Clone Project”
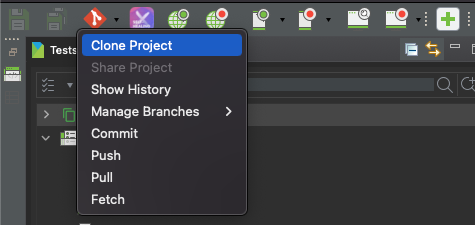
- Enter the Repository URL, username, and password, then click “Finish”
Note: If you wish to run tests locally from Katalon Studio and be able to see the report appear in the TestOps, use the following video to turn on TestOps integration:
Katalon Studio & Katalon TestOps: Quick Integration TutorialCreate and Run Your Test Case
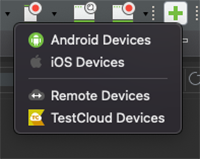
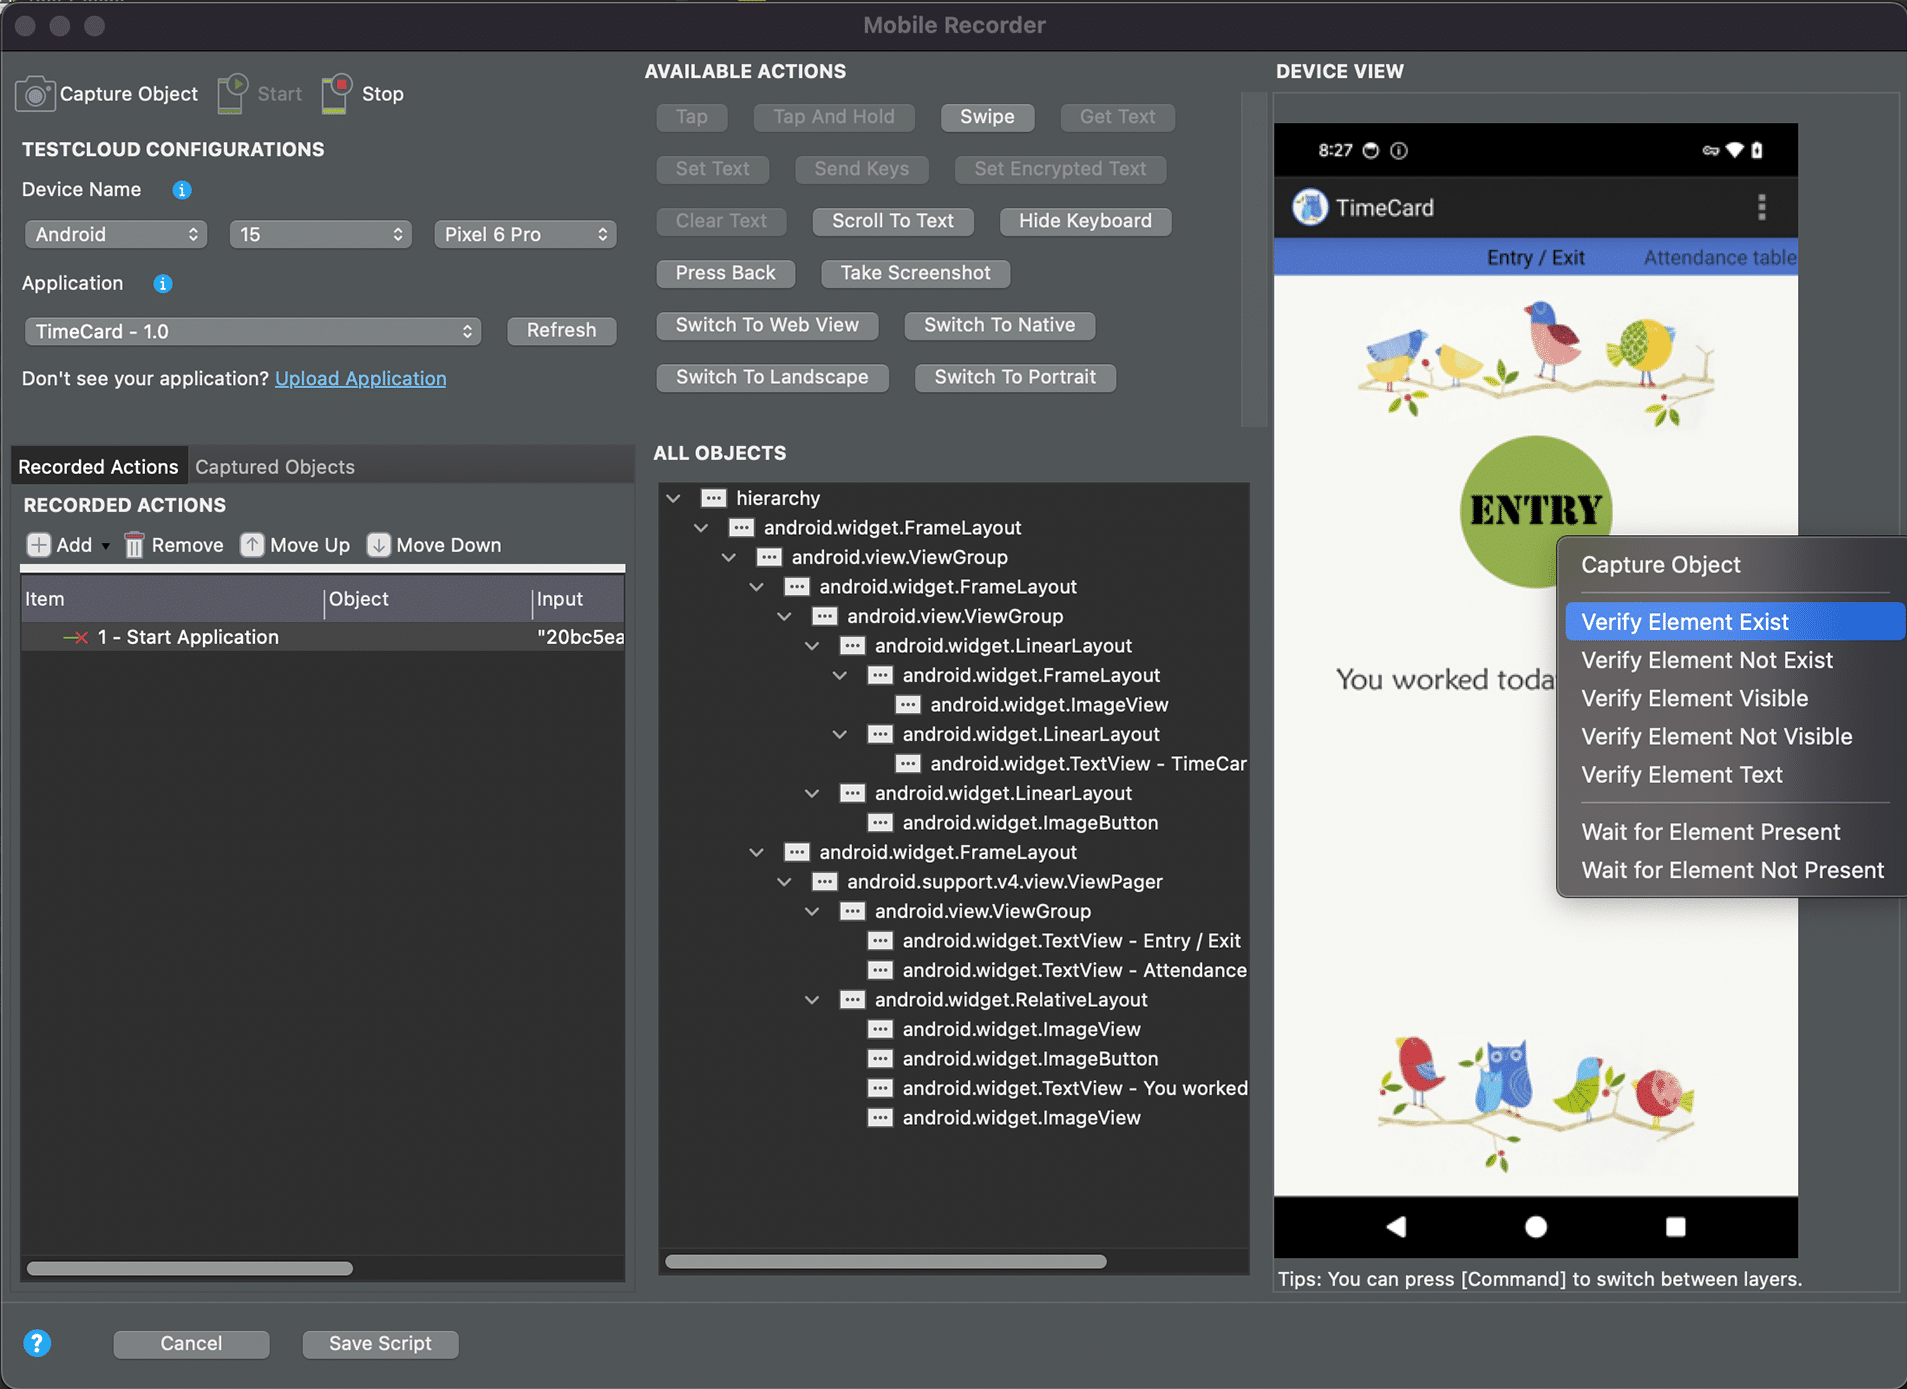
- Create your mobile app test case by clicking on the record button.

- Choose the type of device you are recording on (Android, iOS, Remote device on Lambdatest, or TestCloud Devices).
- Follow the instructions provided in the Katalon Recording Guide.
- Ensure your mobile device is connected if using the recording option for Android or iOS.
- Select the relevant app. For using Lambdatest devices in Katalon Studio, see LambdaTest Integration
- Create your test case using the recording window, then click “Save Script” at the bottom left corner.
Completing Your Test Setup
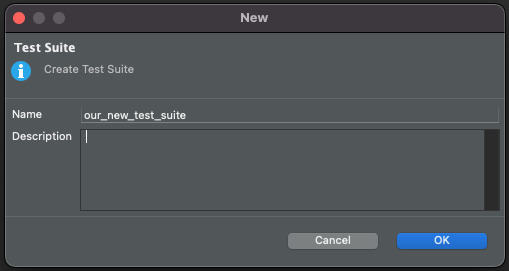
- Enter your Test Case Name and click “Add Test suite”.

- Select “Add to a new test suite”

- Name your test suite and give it a description.
- Click OK
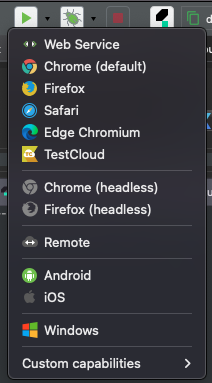
- Click the play button and select from the dropdown menu: Android, iOS, or Remote Device.
- Run the test and then add your new test case to a test suite by clicking on the “Add to test suite” button.

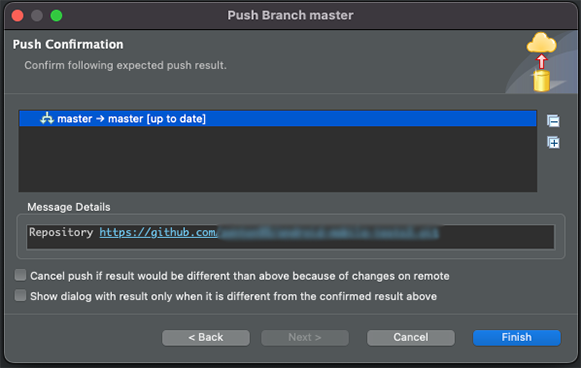
- Push the changes into your Git repository.
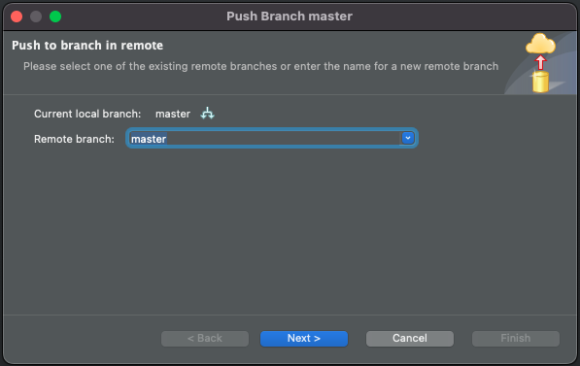
- Click Next
- Enter your login credentials
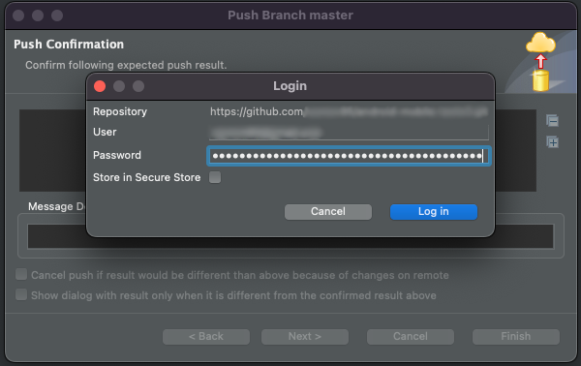
- Click Finish
Running tests from TestOps
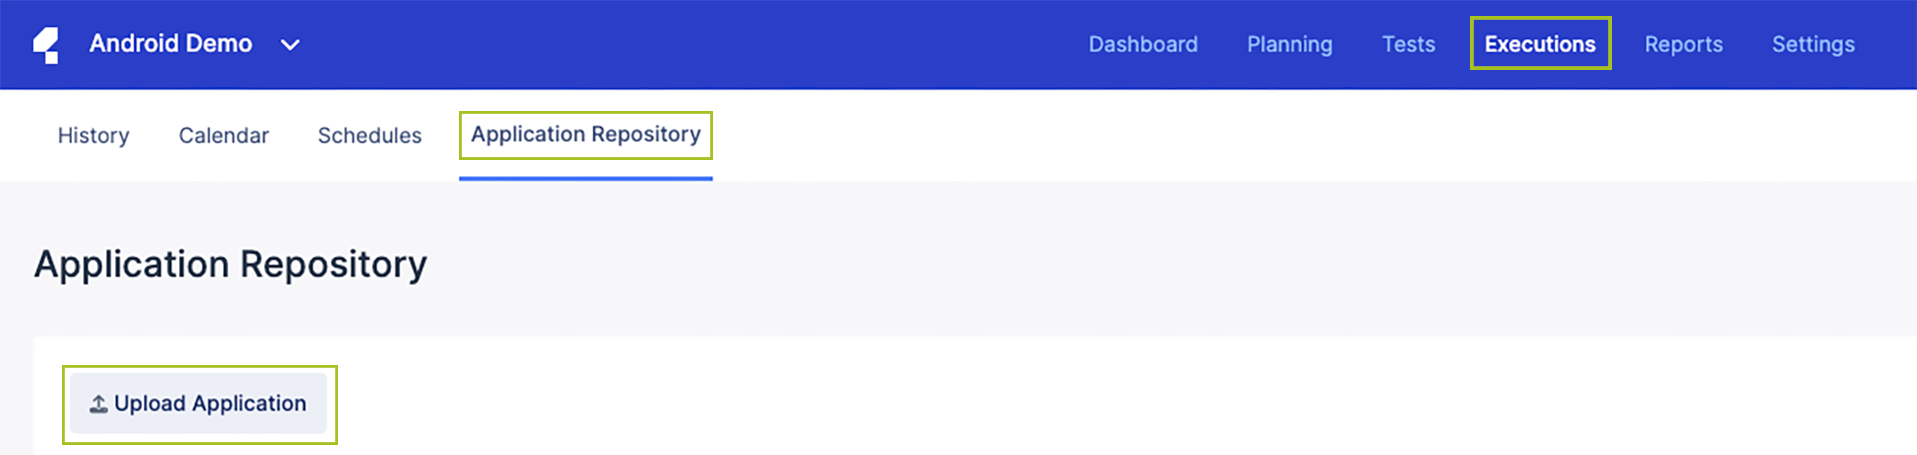
- Open Katalon TestOps
- Navigate to Executions > Application Repository > Upload Application.
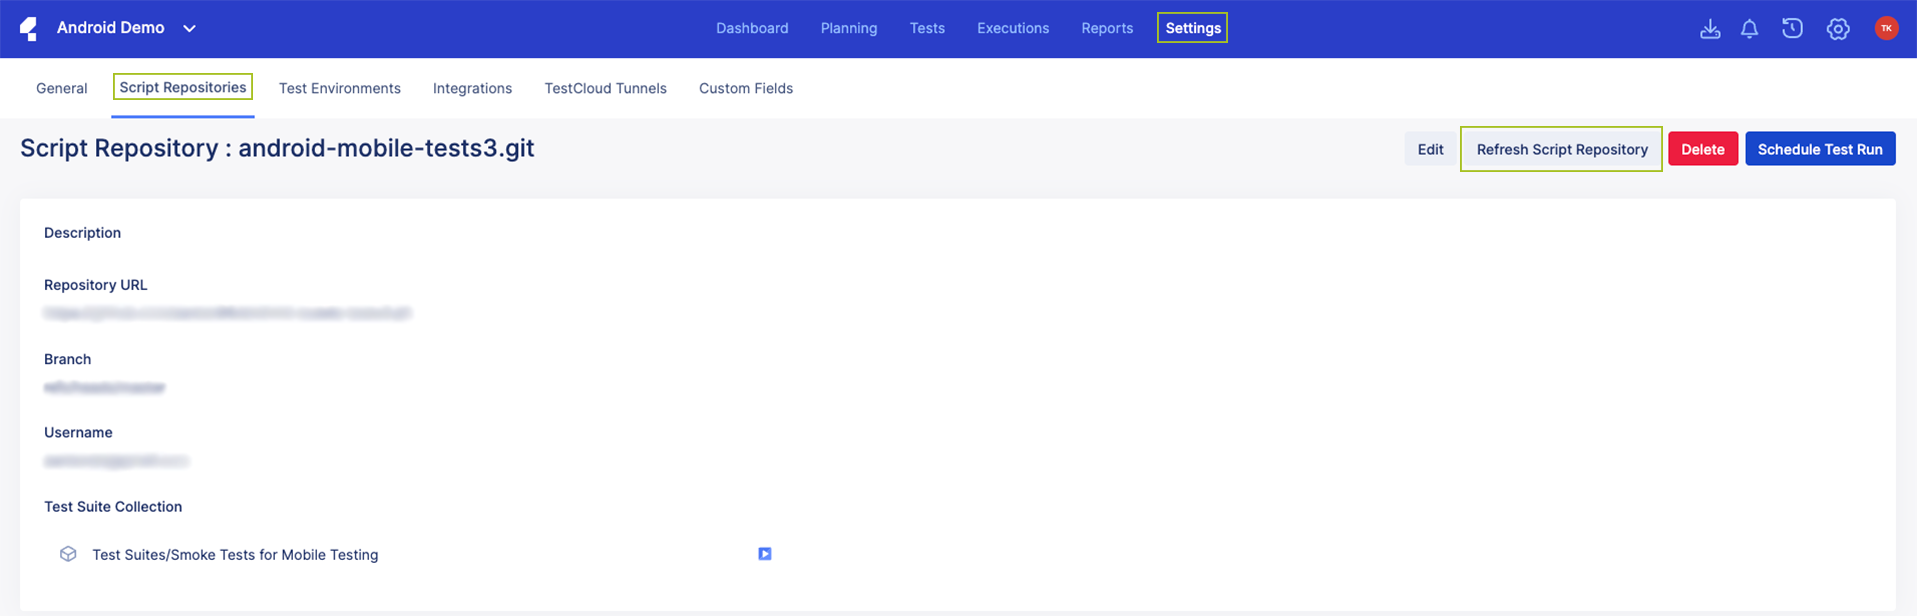
- Go back to the repository settings in the Katalon TestOps
- Go to Settings > Script Repositories
- Select the relevant repository.
- Click on Refresh Script Repository to pull your changes.
- Navigate to the Executions > History.
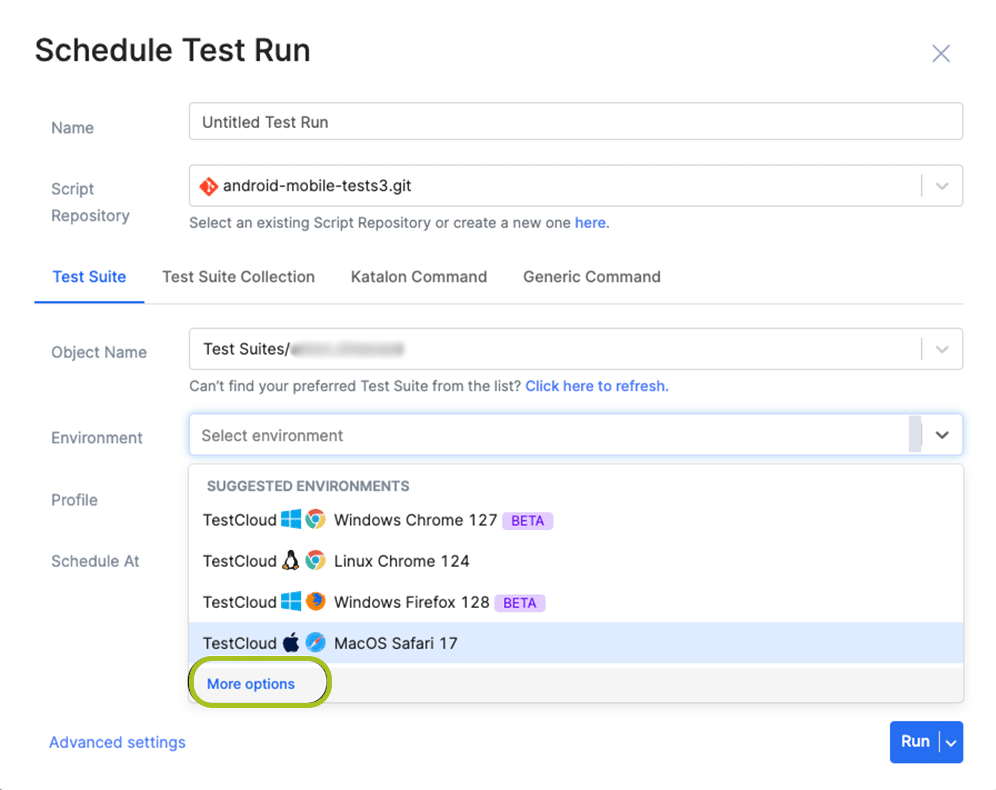
- Click Schedule Test Run.

- In the Schedule Test Run popup window, enter your test name.
- Select your Script repository.

- Select Environment > Click more options
- Click on the Mobile Native App tab.
- Choose the device and model.
- Choose the application that you uploaded for your test.
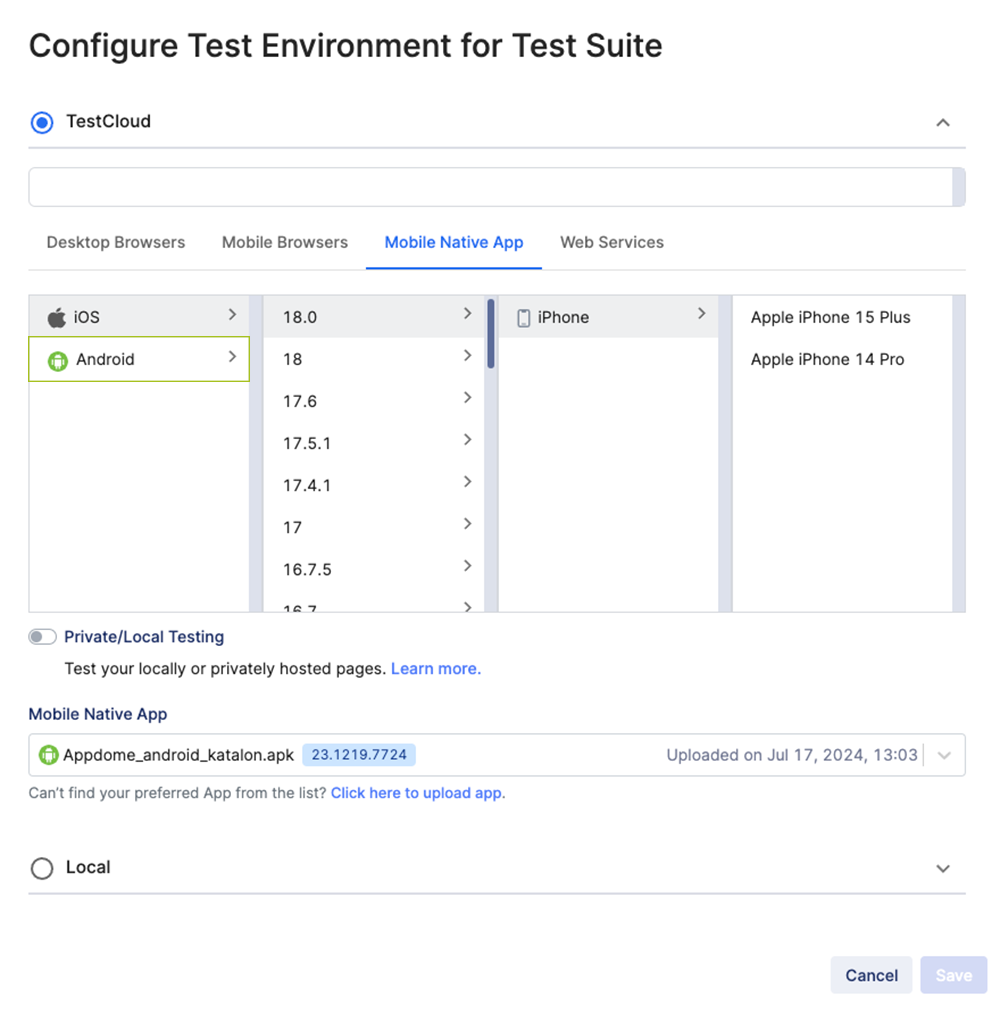
- Click save when you’re done.
- Click Run
For more information about the run, click on your test run and on ‘Details’ at the top right corner.

Related Articles:
- How to Use Appdome’s Build2Test Service
- How to Test Secured iOS Apps on Lambdatest
- How to Test Appdome-secured iOS Apps on BrowserStack
- How to Test Secured Android Apps on BrowserStack
- How to Test Appdome-Secured Android Apps on SauceLabs
- How to Test Secured iOS Apps on SauceLabs
How Do I Learn More?
If you have any questions, please send them our way at support.appdome.com or via the chat window on the Appdome platform.
Thank you!
Thanks for visiting Appdome! Our mission is to secure every app on the planet by making mobile app security easy. We hope we’re living up to the mission with your project.